Within the ‘Settings’ menu you have the ability to set a device name to make it easier to distinguish.
Settings also enables Pocket Stock to be configured so that it can send data to Idealpos through POSServer.
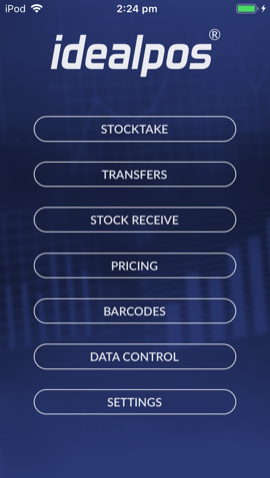
Open the Pocket Stock app on your device by pressing the Pocket Stock icon.
From the main menu screen, select the ‘Settings’ button menu from the selection.
There are two sections that can be configured, Identity and Idealpos Data (POSServer).
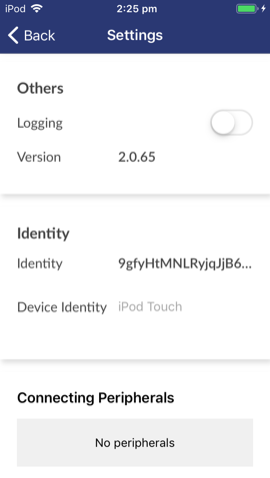
The Identity section contains two fields of data, only one of which is editable.
Press the ‘Device Identity’ field to gain access to the keyboard, where you can enter a name for the device.
This can make it easier to identify when connecting to the POSServer in Idealpos.
This section allows you to connect your device to an Idealpos database, where you can retrieve and upload stock control information.
If you do not plan on connecting the device to an Idealpos database, it is recommended that you do not enable this setting.
For this step you will need the following information:
Press the switch to Enable Connection to the POSServer.
This will now display additional functionality for connecting to Idealpos.
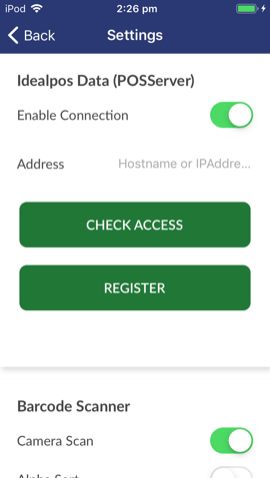
Enter the Hostname or IP Address of the POSServer into the ‘Address’ field and press ‘Return’ or 'Done' to save it.
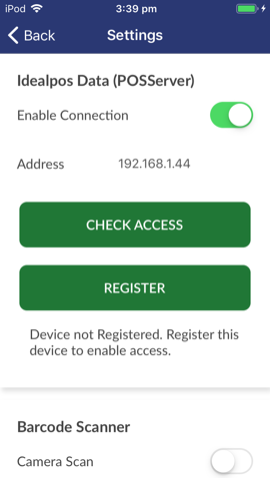
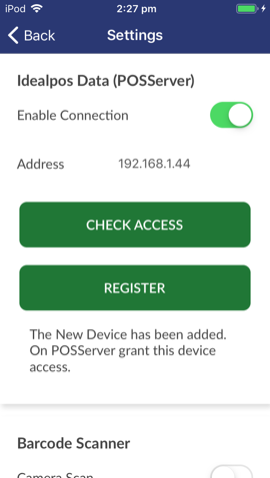
Press the ‘Register’ button to register your device with the POSServer.
If successful, the device will display a message at the bottom of the screen “The New Device has been added.
On POSServer grant this device access”.
If the device already exists in the database, the message at the bottom of the screen will display “Already Exists”.
There are some instances where the device will not connect to the POSServer.
This is indicated by a timeout and will display a message “Error 1001 – The request timed out”.
If there is no network access, a message will display on screen over the settings menu “No Network – No network is currently available – OK”.
Should you encounter this message or any problems with connectivity between Idealpos and Pocket Stock, you may need to check that your Firewall application has an exception to allow specific ports through your Firewall.
Pocket Stock communicates with Idealpos via POSServer and POSServer requires access to TCP Ports 11000 and 11001.
Tip!
When Idealpos is installed, it should automatically create exceptions for the Windows Firewall, however, third party Firewall applications may require exceptions to be created manually in order for Idealpos to have the required access to function correctly.
If required, you can install Idealpos on a system that doesn't have a third-party Firewall application, then any Firewall exceptions can be viewed by opening the Windows Firewall or Windows Defender Firewall and checking the Inbound/Outbound Rules.
All Firewall rules in the Windows Firewall created by Idealpos will be named with an Idealpos Prefix (e.g. Idealpos POSServer).
Once your network is available you can try this step again.
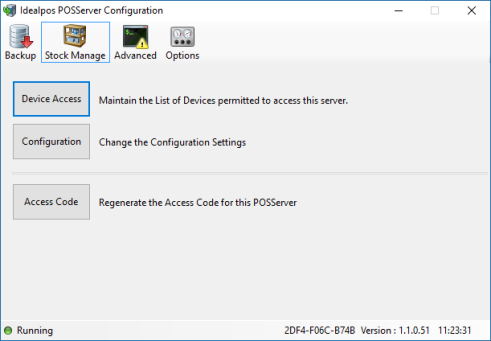
On the PC that the POSServer has been installed on, go to Stock Manage > Device Access.
A new window will open displaying all the devices that have requested access to connect to this POSServer.
The device will be listed with a code which can be confirmed on the device itself.
The name of the device and date it requested access will be displayed.
Select the checkbox under the Allow column to grant the device access.
You can remove a device by right-clicking and selecting remove.
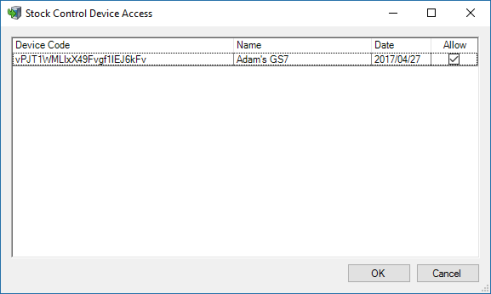
Press ‘OK’ once you have selected the device you want to grant access to.
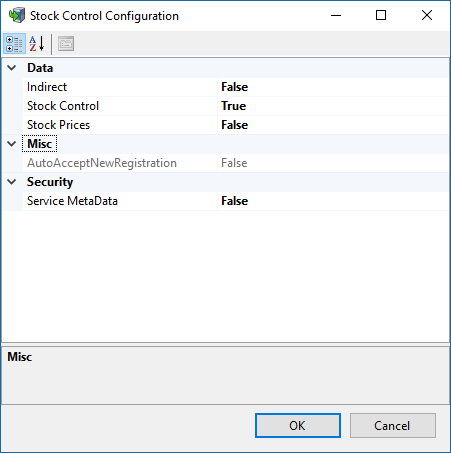
Then go to Stock Manage > Configuration.
The Configuration button will allow you to make changes to the various details that can be customised for the mobile application.
This section will contain two different areas that can be customised by the user.
The defaults that are entered will work correctly without any manual configuration.
Indirect -Select from ‘True’ or ‘False’ to send Indirect Items to the device.
Stock Control - Stock Items marked as Stock Control will be sent if marked as ‘True’. If marked as ‘False’, all Stock Items in the database will be sent to the device.
Stock Prices - Stock Prices will be sent to the device. This setting must be set to True in order to use the Pricing function in Pocket Stock.
Service MetaData - Select from True or False to publish the MetaData, allowing clients to build Stubs against the service /mex.
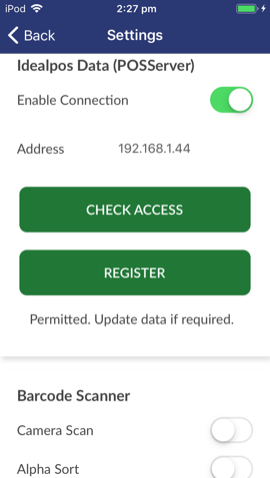
Press ‘Check Access’ to confirm accessibility.
If the device is successful in gaining access to the POSServer, the message that is displayed will be “Permitted. Update data if required”.
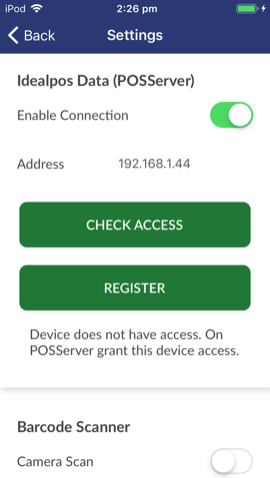
If the device has not been authorised in POSServer, the message will display “Device does not have access. On POSServer grant this device access”.
There are some instances where the device will not have access to the POSServer.
This could also be indicated by a timeout and will display a message “Error 1001 – The request timed out”.
If there is no network access, a message will display on screen over the settings menu “No Network – No network is currently available – OK”.
Once your network is available, you can try this step again.
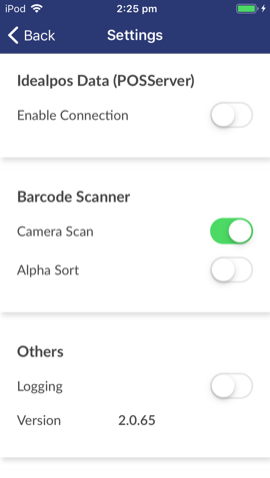
This area allows you to configure the Camera Scan or Alpha Sort.
Toggle this option to use the devices in-built camera as the barcode scanner.
Toggle this option to sort the Stock Items alphabetically.
Toggle this option to enable logging for the Pocket Stock app. Idealpos recommends that this option is enabled.
When Logging is enabled, an additional "System Logging" button will be displayed which can be used to access the System Logs.
When viewing the log, additional options can be accessed by pressing three dots on the bottom-right corner of the screen.
Additional options include:
This displays the version of the Pocket Stock app that is currently installed
This section is only displayed in the iOS version of the Pocket Stock app.
It is used to connect the GeneralScan scanner to the device.
When the GeneralScan Bluetooth scanner is available, the 'No peripherals' button will change to a button showing the name of the GeneralScan scanner.
Pressing the button will trigger the device to establish a connection to the Bluetooth scanner, after which the button will change to a green colour to indicate that a successful connection has been established with the Bluetooth scanner.